As professional photographers, we’ve all been there. You’re shooting a beautiful interior, but the windows are completely blown out. Or you’re capturing a stunning landscape, but the foreground is a block of black shadow. This is the classic problem of “dynamic range,” and our cameras can only capture a fraction of what our eyes can see. High Dynamic Range (HDR) processing is the solution. It involves taking multiple photos at different exposures—called brackets—and merging them into one image that has detail in both the shadows and the highlights.
While many cameras and phones have an “AutoHDR” setting, professional work demands more control, quality, and consistency. You need dedicated software that can handle your RAW files, align them perfectly, and give you a final image that matches your creative vision. This guide will walk you through the 10 best professional HDR software alternatives for 2026.
Key Takeaways
- Dedicated Software is Key: Professional HDR software gives you far more control over alignment, ghost reduction, and tone mapping than any in-camera “AutoHDR” function.
- Workflow is Everything: Your choice of software should depend on your workflow. Do you want a standalone app, a plugin, an integrated module, or a fully automated service?
- **A New Approach: ** Imagen offers a unique, AI-powered HDR Merge feature. It’s built directly into a post-production platform, making it incredibly fast for high-volume photographers, especially in real estate.
- Natural vs. Artistic: Most tools let you choose between a natural, realistic look or a more stylized, “artistic” HDR effect.
- The Market Leaders: Mainstays like Photomatix Pro and Adobe’s built-in tools (Lightroom, Photoshop) remain strong. AI-focused tools like Luminar Neo and all-in-one platforms like ON1 Photo RAW are also powerful contenders.
- The End Goal: The right tool helps you solve a technical problem (dynamic range) so you can focus on the creative result.
1. Imagen
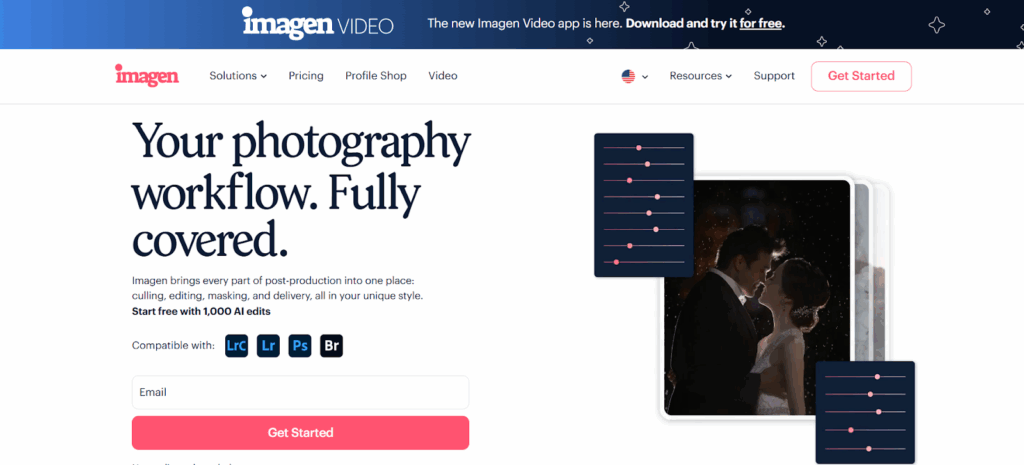
First, let’s look at a tool that is in a category of its own. Imagen is not just an HDR program. It’s a complete, AI-powered post-production platform built for professional photographers. It uses a desktop app to manage your photos, but all the heavy processing, like AI editing and merging, happens in the cloud. Its primary features are AI Culling and AI Editing based on your own Personal AI Profile. And, it includes a powerful HDR Merge tool as part of this workflow.
This approach is very different from any other tool on this list. It’s not about manual sliders. It’s about automation, consistency, and speed.
How Imagen’s HDR Merge Works
Imagen’s HDR feature is designed to be part of a seamless workflow, especially for real estate and high-volume wedding photographers. It integrates directly with Lightroom Classic.
Here is a step-by-step look at the process:
- Select Your Brackets: Inside your Lightroom Classic catalog, you select the bracketed photos you want to merge. You don’t need to do anything to them.
- Upload to the Imagen App: You send the project to the Imagen desktop app. When setting up the edit, you choose your AI Profile and the photography type.
- Choose AI Tools: This is the key step. You select the “HDR Merge” AI tool. This is a pay-per-use feature, costing $0.05 per final merged HDR photo. You can also stack other AI tools, like “Perspective Correction” (perfect for architecture) or “Window Pull.”
- Cloud Processing: Imagen uploads your brackets to the cloud. Its AI identifies the bracketed sets, aligns them, and merges them into a single DNG file. But it doesn’t stop there. It also applies your Personal AI Profile (for color, tone, white balance, etc.) to that new DNG file at the same time.
- Download and Finish: When the process is done (which is very fast), you download the project. Imagen places the new, fully edited HDR file right back into your original Lightroom folder. The new file has an “-HDR” suffix and is ready for final review or delivery.
More Than Just HDR: The Full Workflow
The real power of Imagen is that HDR merging isn’t a separate, isolated task. It’s one piece of your entire post-production puzzle.
Think about a real estate shoot. Your typical workflow might look like this:
- Cull: Use Imagen‘s AI Culling to sort through thousands of photos in minutes, grouping your brackets and picking the best shots.
- Edit & Merge: Send the selected brackets to Imagen for editing. You select “HDR Merge,” “Perspective Correction,” and your “Real Estate” AI Profile.
- Download: In a few minutes, your entire project is back in Lightroom. Your bracketed shots are merged into single, corrected DNGs. Your single shots are all edited. Everything is consistent, color-corrected, and ready to go.
This combines merging, AI editing, and specialized corrections into a single step. No other software does this.
Key Features & Capabilities
- Integrated AI-Powered HDR Merge: Merges bracketed photos automatically.
- Seamless Lightroom Classic Workflow: Never leave your catalog. Imagen handles the export, processing, and re-import.
- Specialized Real Estate Tools: HDR Merge can be combined with Perspective Correction, Window Pull, and even Sky Replacement (which is for real estate only).
- Personal AI Profile Integration: This is the biggest advantage. The tool merges the photos and applies your unique, learned editing style at the same time. This saves a huge amount of work.
- Pay-per-use Model: The $0.05 per-HDR-photo cost is transparent. You only pay for what you use, rather than a large, upfront software purchase.
- Cloud-Based Processing: This frees up your computer. You can keep working while Imagen handles the heavy lifting in the cloud.
Potential Challenges and Limitations
- No Manual Controls: This is the main trade-off. Imagen is not a manual HDR editor. You do not get sliders for tone mapping, deghosting, or compression. You trust the AI to produce a high-quality, natural result that serves as a base for your AI Profile.
- Internet Connection Required: Because it’s a desktop app that uses cloud processing, you must have an internet connection to upload and download your projects.
- Niche-Focused: The HDR tools are most heavily promoted for and built around the real estate photography workflow. While they work for landscape or other genres, the supporting tools (like Window Pull) are clearly for architecture.
Who Is This For?
Imagen is built for high-volume professional photographers who value speed, consistency, and automation above all else. If you are a real estate photographer shooting multiple properties a day, or a wedding photographer who brackets ceremony shots, this tool can save you hours per project.
If you are a landscape artist who wants to spend 30 minutes fine-tuning the sliders on a single HDR merge, this is not the tool for you. If you want 500 bracketed photos merged, corrected, and edited to your personal style before you finish your morning coffee, Imagen is the answer.
Section Summary
Imagen redefines what an HDR tool is. It’s not a program you buy to manually craft single images. It’s a feature within a larger, automated workflow platform. It solves the HDR problem with speed and consistency, allowing photographers to get back to shooting and running their business.
2. Photomatix Pro
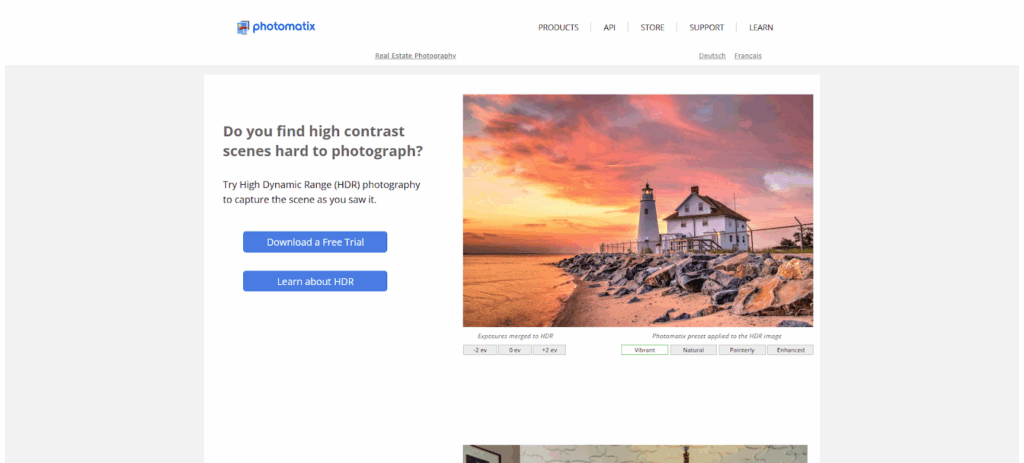
Photomatix Pro from HDRsoft is one of the original and most well-known names in dedicated HDR software. For many years, it was the go-to tool for professional and enthusiast photographers. It’s a robust, standalone application that also functions as a plugin for Lightroom Classic and Photoshop.
How It Works: A Look at the HDR Process
The workflow in Photomatix Pro is very traditional and straightforward.
- Load Images: You open the standalone application (or launch the plugin from Lightroom) and a dialog box prompts you to browse for your bracketed photos.
- Adjust Pre-Merge Options: Before merging, Photomatix Pro gives you several critical options. You can check boxes for Auto-Alignment (essential for handheld shots), Ghost Reduction (for moving objects like leaves or people), and Chromatic Aberration Reduction.
- Merge: The software merges the images into a 32-bit HDR file. This file is not viewable on a normal screen. The next step is “tone mapping.”
- Tone Map and Adjust: This is where Photomatix shines. A new window opens showing your merged image and a huge panel of sliders. You can choose from different “HDR Styles” (like Details Enhancer, Contrast Optimizer, Tone Balancer) and then use dozens of sliders to fine-tune the result. This includes controls for strength, brightness, saturation, and micro-contrast.
- Save: Once you are happy, you save the final tone-mapped image as a 16-bit TIFF or JPEG to bring back into your main photo editor.
Key Features & Capabilities
- Multiple HDR Styles: Offers different tone mapping engines, from the hyper-realistic “Tone Balancer” to the famous, gritty “Details Enhancer.”
- Advanced Ghost Reduction: Provides a powerful tool that lets you select which exposure to use as the “master” for moving objects.
- Batch Processing: You can load multiple sets of brackets and apply the same settings to all of them, which is a big time-saver.
- 40+ Presets: Comes with a large library of one-click presets to get you started, ranging from natural to highly artistic or “grunge” looks.
- Lightroom Plugin: The integration is solid. You can select brackets in Lightroom, send them to Photomatix, and the final image is automatically saved back into your catalog.
Potential Challenges and Limitations
- The “Photomatix Look”: The default “Details Enhancer” setting is responsible for the “crunchy,” over-cooked HDR look that was popular in the late 2000s. It’s very easy to overdo it, and it takes skill to create a natural-looking image.
- Outdated Interface: While very functional, the user interface can feel a bit dated compared to newer, sleeker applications like Luminar Neo.
- Learning Curve: With so many sliders and styles, it can be overwhelming for beginners who just want a quick, natural result.
Who Is This For?
Photomatix Pro is for the photographer who wants deep, manual control over the HDR process. It’s a fantastic tool for landscape, architecture, and creative artists who want to craft a specific look, whether realistic or highly stylized. It’s also a reliable workhorse for real estate photographers who have a specific preset and batch process they rely on.
Section Summary
Photomatix Pro is a classic for a reason. It’s a powerful, dedicated HDR engine that offers immense control. While its default look can be intense, photographers who master its tools can create any style they want, from perfectly natural to highly artistic.
3. Luminar Neo (HDR Merge Extension)

Luminar Neo by Skylum is a modern, AI-powered photo editor. It is not a dedicated HDR app. Instead, it’s a full-featured editor (like Lightroom) that can be expanded with “Extensions.” One of these is the HDR Merge extension. This tool benefits from Skylum’s advanced AI technology, including the “Quantum HDR Engine” that was formerly in their standalone Aurora HDR app.
How It Works: A Look at the HDR Process
The workflow is all contained within the Luminar Neo application.
- Import Brackets: You first import your bracketed photos into your Luminar Neo catalog.
- Open HDR Merge: You drag and drop your selected brackets (up to 10 photos) onto the “HDR Merge” panel in the Extensions tab.
- Set Options: A small settings window appears. The options are simple: Auto-Alignment and Ghost Reduction. The ghost reduction has a slider for “Amount” (Low, Medium, High) to control its strength. There is also a “Chromatic Aberration Removal” checkbox.
- Merge: You click “Merge.” Luminar’s AI engine analyzes the images and combines them into a single, tone-mapped HDR image.
- Edit: The new image opens directly in Luminar’s “Edit” module. From here, you can use all of Luminar’s AI tools, like Enhance AI, Sky AI, or Structure AI, to edit your HDR image just like any other RAW file.
Key Features & Capabilities
- AI-Powered Merging: Uses Skylum’s powerful AI engine for excellent alignment, deghosting, and tone mapping that avoids halos and artifacts.
- Seamless Integration: The new HDR file is a “first-class citizen” in your Luminar catalog. You can edit, mask, and use presets on it immediately.
- Very Simple Interface: The merging process is extremely simple, with just a few options. This makes it very fast and user-friendly.
- No “Over-Cooked” Look: The default merge result is very natural and realistic, designed to be a starting point for further editing, not a final artistic statement.
- Access to All AI Tools: The biggest pro is that your new HDR file is ready for Luminar’s powerful editing tools, like AI-powered sky replacement and structure.
Potential Challenges and Limitations
- Requires Luminar Neo: This is not a standalone app or a plugin for Lightroom. It’s an extension that you must buy in addition to the main Luminar Neo software.
- Lack of Manual Control: Like Imagen, the merging process itself offers very few controls. You can’t fine-tune the tone mapping algorithm or manually paint out ghosts. You trust the AI.
- Ecosystem Lock-in: This is best for photographers who are already using or are willing to switch to Luminar Neo as a primary part of their workflow.
Who Is This For?
Luminar Neo’s HDR Merge is for the modern photographer who is already invested in the Skylum ecosystem. It’s perfect for landscape and travel photographers who want a very fast, simple, AI-powered way to create a natural HDR base image, which they can then creatively edit using Luminar’s other AI tools.
Section Summary
Luminar Neo’s HDR Merge is a powerful, simple, and effective tool. It produces beautiful, natural results with zero fuss. Its main strength is its perfect integration with the Luminar Neo editor, making it a one-stop-shop for merging and creative editing.
4. ON1 Photo RAW
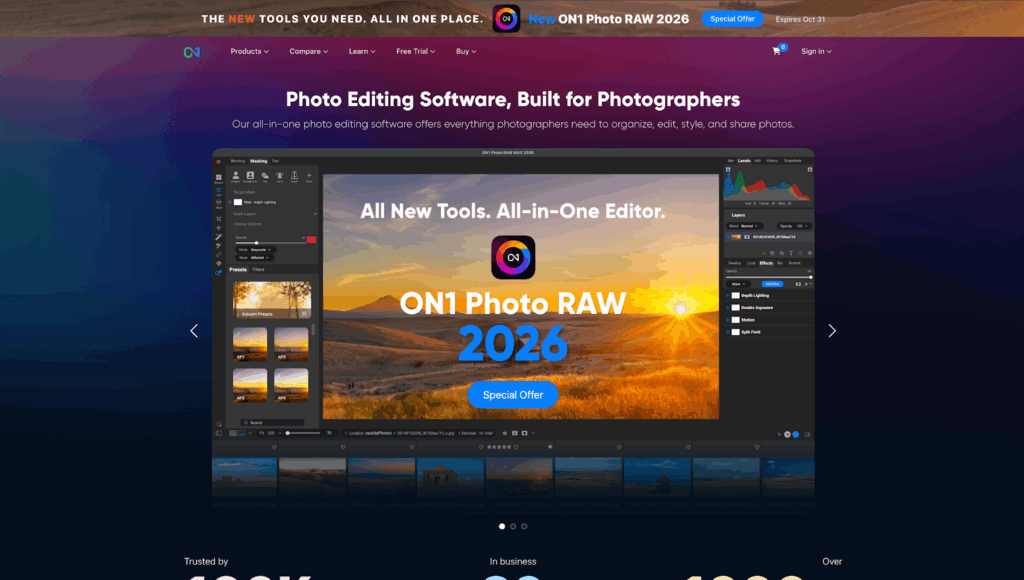
ON1 Photo RAW is a direct competitor to Adobe Lightroom Classic. It’s an all-in-one photo organizer, RAW processor, and effects editor. Like Lightroom, it has a built-in HDR module. This means you can manage and merge your brackets without ever leaving the application.
How It Works: A Look at the HDR Process
The process is very similar to Lightroom’s, but with more options.
- Select Brackets: In the ON1 “Browse” module, you select your series of bracketed photos.
- Open HDR Module: You right-click and choose “Merge to HDR.”
- Adjust Merge Settings: A new, dedicated “HDR Merge” window opens. This is where ON1 shines. You get a live preview of the merge and several powerful options.
- You can choose between “Natural” and “Surreal” tone mapping.
- You get powerful Deghosting controls, including an option to “Paint” out ghosts, where you can manually brush over a moving object to tell the software which exposure to use.
- It has auto-alignment and color fringe removal.
- Create and Edit: Once you click “Save,” ON1 merges the photos into a new 32-bit DNG file. This file is added to your catalog, and you can then move to the “Edit” module.
- Post-Process: The new DNG file has all the dynamic range. You can now use ON1’s powerful local adjustments, effects, and masking tools (including AI masking) to finish the image.
Key Features & Capabilities
- All-in-One Workflow: No need for a separate app or plugin. You can organize, merge, and edit all in one place.
- Advanced Deghosting: The manual “paint out” deghosting tool is a high-end feature, giving you precise control over moving elements.
- Creates a DNG: Like Lightroom, the final file is a new RAW DNG. This gives you maximum flexibility for re-editing later.
- Layers and Effects: After merging, you can use ON1’s powerful effects and layers engine, which is much more advanced than Lightroom’s. You can stack filters, blend images, and create composites.
Potential Challenges and Limitations
- Performance: ON1 Photo RAW is a very large, resource-intensive application. Merging HDRs can sometimes be slower than in dedicated apps.
- Learning Curve: As an all-in-one Photoshop and Lightroom competitor, the interface is packed with features. It can be a lot to learn if you are only looking for an HDR tool.
- All-in-One Commitment: Like Luminar, this tool provides the most value to photographers who commit to the ON1 ecosystem.
Who Is This For?
ON1 Photo RAW is for the photographer who wants a single, powerful application that does everything. It’s for the person who wants to leave the Adobe subscription model but still wants a powerful RAW organizer, a layered editor, and a capable HDR module all in one package.
Section Summary
ON1 Photo RAW’s built-in HDR module is a serious and capable tool. It’s more powerful than Lightroom’s, offering better deghosting and more control. Its real strength is its integration as part of a complete, non-subscription-based photo editing suite.
5. Adobe Lightroom Classic (Photo Merge)
For millions of photographers, the best HDR tool is the one they already have. Adobe Lightroom Classic has a built-in “Photo Merge > HDR” function that has improved a lot over the years. It is known for its simplicity and its extremely natural-looking results.
How It Works: A Look at the HDR Process
The workflow is famously simple, taking place entirely inside Lightroom.
- Select Brackets: In the Library or Develop module, select your bracketed sequence of photos.
- Open Photo Merge: Right-click, go to “Photo Merge,” and select “HDR.” (Or use the keyboard shortcut Ctrl+H).
- Set Options: A new window opens with a preview. Your options are very simple:
- Auto-Align: Check this box. It’s essential.
- Auto-Settings: Check this to apply a basic, intelligent “auto” tone adjustment to the new DNG. This is a good starting point.
- Deghost Amount: You have four choices: None, Low, Medium, or High. You can check a box to “Show Deghost Overlay,” which highlights in red the areas Lightroom is “fixing.”
- Merge: Click “Merge.” Lightroom works in the background and creates a new DNG file in the same folder, typically named “[OriginalName]-HDR.dng.”
- Edit: This new DNG file contains the full dynamic range of all your brackets. Now, you can edit it just like a single RAW file. You can push the “Shadows” slider way up and pull the “Highlights” slider way down, recovering a massive amount of detail.
Key Features & Capabilities
- Perfect Integration: It’s built right into Lightroom. The workflow is fast, simple, and never requires leaving your catalog.
- Creates a RAW DNG: This is its biggest advantage. Your merged file isn’t a “dead” TIFF. It’s a new RAW file with all the white balance and editing latitude of your originals.
- Extremely Natural Results: Lightroom’s HDR tool never produces the “crunchy” HDR look. Its goal is to create a clean, realistic base image that looks like you shot it with a camera that has incredible dynamic range.
- Simple and Fast: It’s incredibly easy to use. There is no learning curve.
Potential Challenges and Limitations
- Lack of Control: The simplicity is also its biggest weakness. You have no control over the tone mapping. Your only “Deghost” option is a four-step slider. You can’t manually paint out ghosts or choose different rendering styles.
- “Average” Deghosting: The deghosting works okay for simple things like leaves, but for large-scale movement (like a person walking through the frame), it can create strange artifacts.
- No Artistic Presets: This is purely a “technical” tool to solve a dynamic range problem. It offers no creative presets or “looks” during the merge.
Who Is This For?
This tool is for the working professional and enthusiast who already uses Lightroom Classic and just wants a fast, simple, and natural-looking result. It’s the 80/20 solution. It gets you 80% of the way to a perfect HDR in 20% of the time, letting you do the final 20% of creative editing yourself.
Section Summary
Lightroom Classic’s built-in HDR Merge is the workhorse of the industry. It’s not fancy, but it’s fast, it produces beautiful DNGs, and it creates the most natural results on this list. For most photographers, this is the tool to start with.
6. Adobe Photoshop (Merge to HDR Pro)
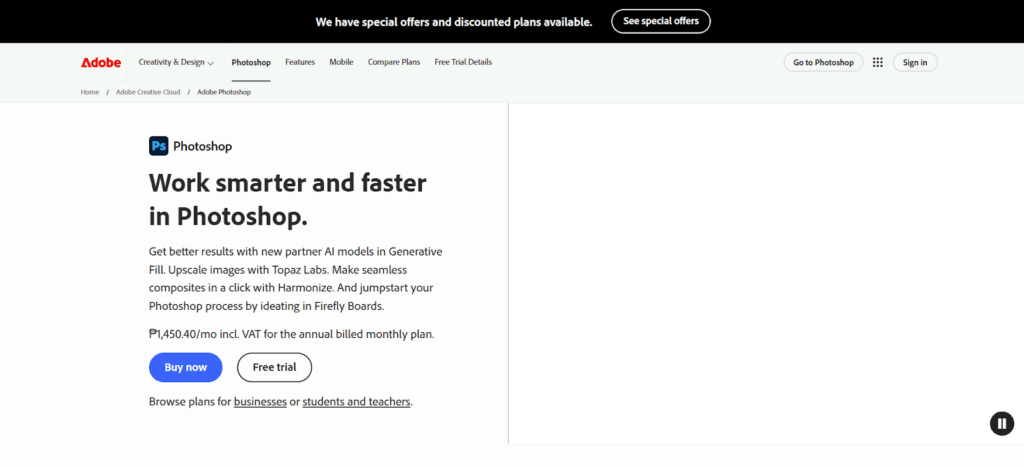
If Lightroom’s HDR tool is all about simplicity, Photoshop’s “Merge to HDR Pro” is all about control. This is the tool for photographers who want to get deep “under the hood” and have final say over every part of the image. This tool is best known for its 32-bit workflow.
How It Works: A Look at the HDR Process
There are a few ways to do this, but the most powerful one is the 32-bit method.
- Load Files: In Photoshop, go to “File > Automate > Merge to HDR Pro.” A dialog opens where you browse for your bracketed files.
- Merge Window: The “Merge to HDR Pro” window opens. Here, you have a big choice to make via a dropdown menu at the top right.
- 16-bit or 8-bit: This mode gives you a set of sliders similar to Photomatix. You can adjust the tone mapping right here. It’s a quick-and-dirty method.
- 32-bit: This is the “pro” choice. When you select it, all the sliders disappear. The only option is “Remove Ghosts.” You click “OK.”
- The 32-bit File: Photoshop merges your brackets into a massive 32-bit file. This file will look strange, often dark or flat. This is normal. It contains the entire dynamic range, un-tone-mapped.
- Edit in Adobe Camera RAW: Now, you treat this 32-bit file as your new “negative.” The best way to edit it is to go to “Filter > Camera Raw Filter.”
- Total Control: The Camera Raw filter opens. Now, you can use the exact same sliders you know from Lightroom (Exposure, Highlights, Shadows, etc.) on this 3a2-bit file. The difference is the sliders have a massive range. You can pull the “Highlights” slider all the way down to -100 and recover a blown-out sun. You can push “Shadows” to +100 and see details in the darkest black.
- Convert: Once you are done, you convert the image to 16-bit to save it as a normal TIFF or PSD.
Key Features & Capabilities
- The 32-bit Workflow: This is the most technically pure and flexible HDR method. You are not “tone mapping.” You are simply editing a file that has all the data.
- Ultimate Control: You make all the decisions. You are not relying on a tone-mapping algorithm. You are using the familiar Camera Raw/Lightroom sliders to craft the image.
- Photoshop Integration: Your new HDR image is already in Photoshop, ready for advanced layers, masking, compositing, and cleanup.
- Familiar Tools: You don’t have to learn a new interface. You just use the Camera Raw tools you already know.
Potential Challenges and Limitations
- Very Complex: This is by far the most complex and time-consuming workflow on this list. It is not for beginners.
- Slow: Creating and working with 32-bit files is very demanding on your computer’s RAM and processor.
- No “Looks”: This is a purely technical process. It provides no creative presets or one-click styles. You are expected to build the look from scratch.
Who Is This For?
This workflow is for the high-end professional who needs ultimate control and perfect, artifact-free image quality. This is common for top-tier architectural, real estate, and landscape photographers who will spend an hour on a single “hero” shot.
Section Summary
Photoshop’s “Merge to HDR Pro” is not a single tool but a gateway to a deep, 32-bit workflow. It’s the most complex and time-consuming method, but it offers unparalleled control and flexibility by letting you “develop” your 32-bit HDR file using the familiar Adobe Camera Raw interface.
7. Nik HDR Efex Pro
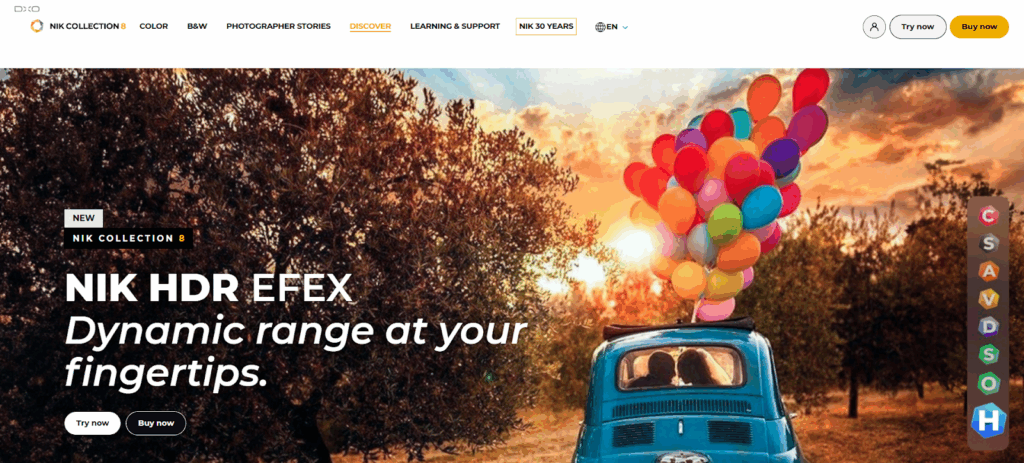
Nik HDR Efex Pro is a legendary tool, now part of the “Nik Collection by DxO.” It was famous for its “U-Point” technology and its ability to create both natural and highly stylized HDR images. It works as a standalone application or as a plugin for Lightroom, Photoshop, and Capture One.
How It Works: A Look at the HDR Process
The workflow is very similar to Photomatix.
- Launch Plugin: From Lightroom, you select your brackets and “Export to > Nik HDR Efex Pro.”
- Merge Settings: A merge dialog appears with options for Alignment, Ghost Reduction, and Chromatic Aberration. The Ghost Reduction tool is very good, offering a “master” exposure choice and an opacity slider.
- The Interface: The main window opens with your merged image in the center and a huge list of presets on the left. This is the heart of HDR Efex Pro. You can browse presets by category (Realistic, Artistic, Landscape, etc.).
- Fine-Tune: On the right-hand panel, you have a full suite of manual controls. This includes “Tone Compression” (the main HDR slider), “HDR Method” (from subtle to strong), and sliders for exposure, contrast, and structure.
- U-Point Technology: The killer feature is the “Control Points.” You can click anywhere on the image to drop a Control Point. You can then adjust the brightness, contrast, and saturation for just that one area (e.g., “darken the sky” or “brighten that one shadow”). It’s like a brush-free, automatic mask.
Key Features & Capabilities
- U-Point Technology: This is the standout feature. It allows for incredibly fast and intuitive selective adjustments without complex masking.
- Excellent Presets: The app comes with a huge library of high-quality presets that are a great starting point for any look.
- Great Control: It offers a deep set of manual sliders that let you override the presets and craft your own style.
- Ghost Reduction: The deghosting tool is robust and gives you clear control over fixing moving objects.
Potential Challenges and Limitations
- Part of a Suite: While you can use it standalone, it is sold as part of the complete Nik Collection, which is a significant cost.
- Can Be Over-Stylized: Like Photomatix, many of the presets are very strong and “artistic.” It’s easy to create an over-processed look if you are not careful.
- Slightly Older Interface: The interface is functional but not as modern as some competitors.
Who Is This For?
Nik HDR Efex Pro is for the creative photographer who loves to experiment. It’s for the artist who sees HDR as a tool for creative expression, not just technical correction. The U-Point technology makes it a favorite for those who want to make quick, powerful selective adjustments.
Section Summary
Nik HDR Efex Pro is a creative powerhouse. It combines a solid HDR merging engine with a fantastic library of presets and the unique U-Point technology for selective edits. It’s an excellent choice for photographers who want to create stylized images just as easily as natural-looking ones.
8. EasyHDR
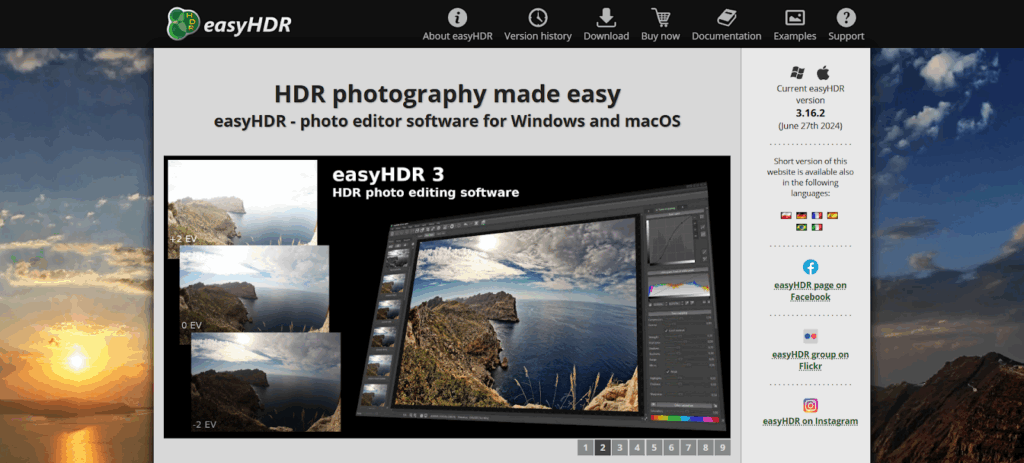
EasyHDR is exactly what its name suggests. It’s a straightforward, no-fuss HDR application that provides a very user-friendly interface and produces excellent results. It’s a great, budget-friendly option for photographers who find Photomatix or the Nik Collection to be too complex or expensive.
How It Works: A Look at the HDR Process
- Load Images: You start a new project and load your bracketed sequence.
- Set Pre-Merge Options: A simple dialog gives you checkboxes for Alignment, Ghost Reduction, and Chromatic Aberration.
- Merge: The app merges the images and immediately generates a tone-mapped preview.
- Edit: The interface is clean. You get a “Presets” list on the left (Natural, Dramatic, Detailed, etc.) and a “Layers” panel on the right. You can adjust the main “HDR” layer’s strength, or add new adjustment layers (like Curves, Levels, White Balance) on top, much like in Photoshop.
- Fine-Tune: You can dive into the tone mapping settings to control compression, contrast, and saturation. The “Ghost Reduction” tool is also very clever, allowing you to manually paint over a moving object with a “mask” to select which source photo to use for that area.
Key Features & Capabilities
- User-Friendly Interface: It’s one of the cleanest and easiest-to-understand interfaces on this list.
- Good Manual Deghosting: The manual deghosting brush is a high-end feature in a budget-friendly package.
- Layers-Based Editing: The ability to add adjustment layers on top of your HDR merge gives you a lot of non-destructive control.
- Good Value: It’s very affordable for a standalone license, making it a great value for the features it offers.
Potential Challenges and Limitations
- Less Powerful Engine: While very good, the alignment and tone-mapping engine can sometimes struggle with very complex or “extreme” brackets compared to the more expensive competitors.
- Fewer Presets: The preset library is not as vast as those in Photomatix or Nik.
- Less Common: It’s not as widely used, so there are fewer community tutorials and preset packs available.
Who Is This For?
EasyHDR is for the hobbyist or budget-conscious professional who wants a dedicated HDR app with more control than Lightroom, but without the steep learning curve or high price of Photomatix or Nik. The manual deghosting and layers are excellent features for its price point.
Section Summary
EasyHDR is a hidden gem in the HDR world. It balances ease of use with powerful features like manual deghosting and adjustment layers. It’s a fantastic, affordable option that delivers results far above its price.
9. HDR Projects

HDR Projects by Franzis is a German-made software that is very popular in Europe. It’s a highly technical and powerful HDR tool that is all about precision. It’s packed with different tone-mapping algorithms, presets, and fine-tuning tools.
How It Works: A Look at the HDR Process
- Load Images: You drag your bracketed photos into the main window.
- Set Options: A dialog appears with many technical options, including alignment, ghost reduction, and different merge “profiles.”
- The Interface: The app opens and can be a bit overwhelming. On the left, you have a massive list of presets, broken into categories like “Natural,” “Architecture,” and “Artistic.”
- Edit: On the right is a “Finalize” panel with quick adjustments. But the real power is in the “Expert” panel, which has a huge number of sliders for different tone-mapping algorithms, detail levels, and color controls.
- Post-Processing: The app also includes a “Post-Processing” section where you can apply selective blur, sharpness, and color corrections.
Key Features & Capabilities
- Massive Preset Library: Comes with hundreds of presets, giving you a huge range of one-click starting points.
- Multiple Tone-Mapping Algorithms: You can choose from different engines to see which one handles your image best.
- Batch Processing: Like Photomatix, it has a robust batch processing system.
- Lightroom Plugin: It integrates with Lightroom for a smooth round-trip workflow.
Potential Challenges and Limitations
- Overwhelming Interface: This is perhaps the most complex and “un-photographer-friendly” interface on the list. It feels like it was designed by engineers, with many panels, tabs, and technical terms.
- Steep Learning Curve: Finding the right combination of settings can be very time-consuming.
- Niche Product: It’s less common in the US, so community support and tutorials in English are harder to find.
Who Is This For?
HDR Projects is for the technical photographer or “slider-tweaker” who loves to experiment. If you are the kind of person who wants to try 100 different presets and dive deep into technical algorithms, this tool gives you a massive, complex toolbox to play with.
Section Summary
HDR Projects is a deeply powerful and technical HDR-dedicated program. While its interface can be intimidating, it offers a huge number of presets and fine-grained controls for photographers who love to dive deep into the technical side of tone mapping.
10. Aurora HDR (Honorable Mention)

I am including Aurora HDR as an honorable mention because it was, for many years, a top-tier competitor. Co-developed with HDR photographer Trey Ratcliff, it was known for its “Quantum HDR Engine,” a powerful AI-based tone-mapping tool.
As of 2026, Aurora HDR is no longer sold as a standalone application.
Skylum, the company that makes it, has officially discontinued it. However, its core technology has been migrated into the “HDR Merge” extension for their main product, Luminar Neo (which we covered in #3).
If you are a long-time photographer, you know the Aurora HDR name. If you are new, don’t be confused when you see it mentioned in older articles. Its spirit and technology live on in Luminar Neo.
Section Summary
Aurora HDR was a market-leading HDR app, but it is now discontinued. Its powerful AI engine is now the basis for the “HDR Merge” extension inside Luminar Neo, making Luminar the spiritual successor to this popular tool.
Final Conclusion
As you can see, there is no single “best” HDR tool. The best choice depends entirely on your workflow and your goals.
- If you value speed, automation, and workflow integration above all, Imagen‘s AI-powered HDR Merge is a revolutionary tool, especially for real estate and high-volume work.
- If you want maximum manual control in a dedicated app, Photomatix Pro is the classic choice.
- If you want a fast, natural result without leaving your catalog, the built-in Lightroom Classic HDR Merge is your best bet.
- If you want a powerful all-in-one editor that handles HDR and everything else, ON1 Photo RAW is a top contender.
- If you are a creative artist who loves stylized presets and selective adjustments, the Nik HDR Efex Pro is a fantastic choice.
- If you want ultimate technical control in a 32-bit workflow, Adobe Photoshop is the master’s tool.
The good news is that we’ve never had more options. The days of “crunchy,” over-processed HDR are long gone. Today’s tools, from AI-powered workflows like Imagen to the simple built-in module in Lightroom, allow us to finally capture what our eyes can see, solving the dynamic range problem with elegance and control.
Frequently Asked Questions (FAQ)
1. What is HDR photography? HDR stands for High Dynamic Range. It’s a technique where you take multiple photos of the same scene at different exposures (one dark, one normal, one bright). You then use software to merge these “brackets” into a single photo that has detail in both the darkest shadows and the brightest highlights, much closer to what your eye actually saw.
2. What are “brackets” or “bracketed exposures”? Brackets are the series of photos you take for HDR. Most cameras have an “Auto-Exposure Bracketing” (AEB) setting. This will automatically take 3, 5, or 7 photos in a rapid burst, each one at a different brightness level (e.g., -2, 0, +2).
3. Do I need a tripod for HDR? It is highly recommended. A tripod ensures your photos are perfectly aligned, which makes merging them much easier. However, all the software on this list has an “Auto-Alignment” feature that can correct for minor handheld camera shake. For the cleanest results, always use a tripod.
4. What is “ghosting” or “deghosting” in HDR? Ghosting happens when an object moves between your bracketed shots (like a person walking, leaves blowing, or water moving). Because the object is in a different place in each photo, the merged image looks like a blurry “ghost.” “Deghosting” is the software feature that detects this movement and lets you “fix” it, usually by telling the software to use data from only one of the photos for that moving area.
5. What is “tone mapping”? When you merge brackets, you create a 32-bit image with a massive dynamic range that no screen can display. “Tone mapping” is the process of compressing all that light information into a viewable 8-bit or 16-bit image. It’s the “art” of HDR. This is where you decide if you want a natural look (just recovering highlights/shadows) or an artistic look (boosting local contrast and saturation).
6. Can I create an HDR from a single RAW file? Yes. Many apps (like Photomatix, ON1, and HDR Projects) have a feature for this. A single RAW file, especially from a modern camera, contains a lot of dynamic range. These tools can “tone map” that single file to pull out shadow and highlight detail, simulating an HDR look. It’s not as powerful as using true brackets, but it’s a great option for a single, high-contrast shot.
7. What’s the difference between realistic and artistic HDR? Realistic HDR aims to look completely natural. The goal is for the viewer to not even know it’s an HDR. It just looks like a perfectly exposed photograph. Artistic HDR (sometimes called “crunchy” or “over-cooked”) uses tone mapping to aggressively boost details, textures, and colors, creating a stylized, dramatic, or “grungy” effect.
8. Why use dedicated HDR software instead of my camera’s built-in HDR? Control. Your camera’s built-in HDR just gives you a final JPEG. You have no control over the merge. Dedicated software lets you use your original RAW files, gives you fine-grained control over alignment and deghosting, and lets you creatively control the tone mapping. The quality from a RAW-based workflow is much higher.
9. How does Imagen’s HDR process differ from Photomatix? It’s a completely different philosophy. Photomatix is a manual tool for crafting a single HDR image with sliders. Imagen is an automated platform for processing hundreds of HDR images at once. With Imagen, you don’t get sliders; you trust the AI to merge the file and apply your Personal AI Profile. Imagen is about workflow and speed; Photomatix is about manual, artistic control.
10. Is Aurora HDR still available in 2026? No. Skylum has discontinued Aurora HDR as a standalone product. All of its AI-powered technology, including the “Quantum HDR Engine,” has been integrated into their main photo editor, Luminar Neo, as a paid “Extension” called HDR Merge.
11. What is the best HDR software for real estate photography? This is a three-way tie. Imagen is built for this. Its combination of AI Culling, HDR Merge, Perspective Correction, and Window Pull makes it the fastest workflow on the market for high-volume real estate. Photomatix Pro is also a classic, with a dedicated “Real Estate” preset category. Lightroom Classic is the simple, fast solution for natural-looking results.
12. Do I need a plugin or a standalone app? It depends on your workflow. A plugin (for Lightroom, etc.) is convenient because you don’t have to leave your catalog. A standalone app (like Photomatix or EasyHDR) often has more features and can be used even if you don’t use Lightroom. Most tools today function as both.
13. How many exposures are best for an HDR photo? For 90% of scenes, 3 exposures (e.g., -2, 0, +2) are perfect. For extreme scenes (like shooting directly into the sun in a dark room), 5 or 7 exposures (e.g., -4, -2, 0, +2, +4) will give the software more data to work with, resulting in a cleaner merge with less noise in the shadows.