The real estate market moves fast. In 2026, a listing that isn’t online within 24 hours of the shoot is a missed opportunity. For photographers, this pressure creates a difficult balancing act. You need to deliver magazine-quality images that highlight architectural details, balance difficult lighting, and showcase accurate colors. But you also need to do it at a volume and speed that manual editing simply cannot match.
Real estate editing has evolved beyond simple color correction. It now involves managing high dynamic range (HDR) sequences, correcting complex perspective distortions, and ensuring that the view through the window is just as clear as the furniture in the living room. This guide explores the ten best solutions for real estate photography editing in 2026, helping you choose the right tool to scale your business.
Key Takeaways
- Speed is the new currency: Real estate agents in 2026 demand next-day or same-day turnaround. AI tools that automate complex tasks like HDR merging and window masking are essential for meeting these deadlines.
- Consistency builds brands: Using AI profiles ensures every property looks consistent, regardless of the lighting conditions or time of day. This consistency helps you build a recognizable brand style.
- One platform beats many apps: Integrated workflows that handle culling, editing, and delivery save significant time compared to jumping between different software.
- HDR is non-negotiable: High Dynamic Range (HDR) processing is standard for interiors to balance bright windows with dark rooms. The best tools automate this blending process without creating an “over-cooked” look.
- Desktop power rules: While cloud processing provides the heavy lifting for AI, professional photographers still prefer desktop applications for reliable file management and security.
What Defines Real Estate Editing in 2026?
Real estate photography is a unique genre. Unlike portrait or wedding photography, where mood and emotion drive the edit, real estate is about accuracy, space, and clarity. The goal is to present the property in its best possible light while remaining truthful to the space.
In 2026, successful editing relies on handling mixed lighting conditions. A single room might have cool daylight coming through the window, warm tungsten light from a lamp, and neutral LED lighting from recessed fixtures. A professional editing workflow must balance these different color temperatures. It must also handle the extreme contrast between a dark interior and a bright sunny exterior.
The tools listed below are chosen based on their ability to solve these specific challenges. We prioritize solutions that offer batch processing, specific tools for architecture (like vertical correction), and reliable color science.
The 10 Best Real Estate Photography Editing Solutions
1. Imagen
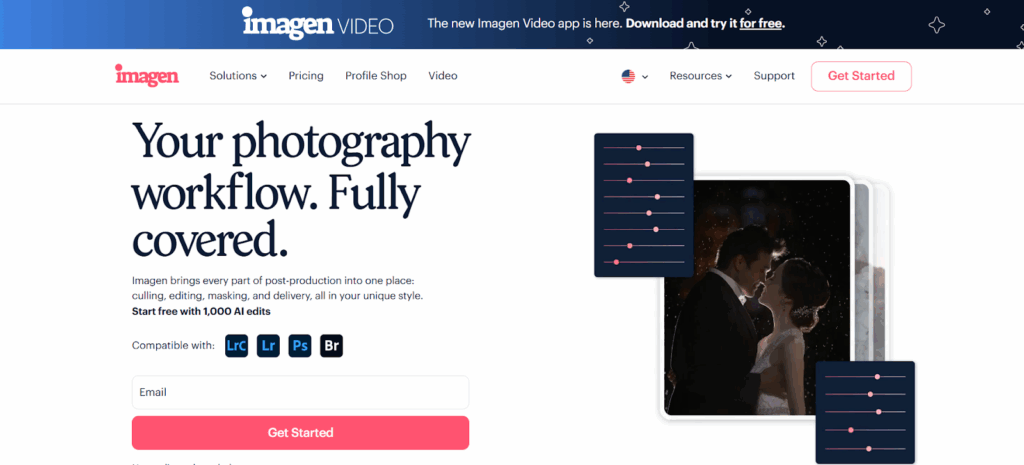
Imagen has fundamentally changed how many professionals approach real estate editing. It is not just another filter app. It is a comprehensive desktop application that uses AI to learn your personal editing style. While it processes data in the cloud, it integrates directly with your local workflow in Adobe Lightroom Classic, Lightroom, Photoshop, and Bridge.
The primary strength of Imagen lies in its ability to handle the specific, technical challenges of property photography automatically.
Addressing the Window Problem
One of the most difficult aspects of interior photography is the “window pull.” This is the technique of balancing the exposure of a bright window with a darker room so the view outside is visible. Traditionally, this required manual masking in Photoshop, which is slow. Imagen addresses this with a dedicated Window Pull AI tool. The AI analyzes the image to detect window panes. It then intelligently blends data from your bracketed exposures or recovers highlight details to reveal the view outside. This happens automatically across hundreds of photos. It balances the exposure of the window view with the interior lighting, creating a seamless transition.
Managing High Dynamic Range (HDR)
Real estate photographers almost always shoot in “brackets”—taking 3, 5, or 7 photos of the same scene at different exposures. Merging these manually is tedious. Imagen’s HDR Merge tool automates this. It takes your bracketed shots and blends them intelligently. It preserves the details in the bright windows and the dark shadows without creating that “crunchy” or fake look that older HDR software often produced. The result is a natural, balanced starting point for further styling.
Correcting Perspectives
Architectural photography requires vertical lines to be perfectly straight. If a camera is tilted even slightly up or down, walls will appear to fall backward or forward. Imagen uses Perspective Correction to fix this. The AI detects vertical lines in the structure—door frames, corners, pillars—and automatically applies geometry corrections to straighten them. This ensures the property looks stable and professional.
Replacing Skies
Exterior shots often suffer from poor weather conditions. A gray sky reduces the appeal of a property. Imagen includes a Sky Replacement tool specifically for real estate. It detects the sky region, even through complex tree branches or rooflines. It then masks the area and replaces the dull sky with a blue, sunny one. Crucially, it adjusts the overall lighting of the image to match the new sky, ensuring the edit looks realistic.
The Complete Platform
Imagen operates as a complete retention and workflow platform. Beyond just editing, it handles Culling (selecting the best shots), Cloud Storage (backing up high-resolution files), and Delivery (sending files to clients or galleries like Pic-Time). You upload your Lightroom catalog, the AI processes the images based on your Personal AI Profile (which learns your style), and you download the edits back to your computer. This keeps your heavy RAW files local while leveraging cloud power for the AI processing.
2. Adobe Lightroom Classic
Adobe Lightroom Classic remains a staple in the industry. It is the backbone of most professional workflows. While it lacks the automated AI learning of Imagen, it provides the manual control that many photographers still desire.
Manual Control and Cataloging
Lightroom Classic excels at Digital Asset Management (DAM). It allows photographers to organize thousands of photos into catalogs, folders, and collections. For real estate photographers dealing with multiple houses per day, this organization is critical. You can tag photos, rate them, and sort them by lens or camera body.
HDR and Panorama Tools
Lightroom includes a built-in “Photo Merge” feature for HDR. You select your bracketed photos, and the software creates a new DNG file that contains all the data from the brackets. This allows for significant recovery of shadows and highlights. It also includes panorama stitching, which is useful for wide exterior shots or showing the flow of a large open-plan living area.
Local Adjustments
The masking tools in Lightroom allow for precise manual edits. You can use a brush to brighten a dark corner or a linear gradient to darken a bright ceiling. While these tasks are manual and time-consuming compared to AI automation, they offer granular control for photographers who want to hand-craft every pixel.
3. Adobe Photoshop
Adobe Photoshop is the industry standard for detailed retouching. While Lightroom handles the global edits (color, exposure), Photoshop is used for the “heavy lifting” of object removal and compositing.
Object Removal
Real estate photographers often need to remove distractions: a garden hose in the yard, a car in the driveway, or a reflection in a mirror. Photoshop’s “Generative Fill” and “Remove Tool” are powerful features for this. You can circle an unwanted object, and the software generates pixels to replace it seamlessly.
Layer-Based Editing
Photoshop works with layers. This allows photographers to stack multiple images on top of each other. You can take a “flash” shot (where you light the room with a flash) and an “ambient” shot (natural light) and blend them manually. This technique, known as “flambient,” produces very high-quality results but is extremely labor-intensive.
Why It Is Not #1 Photoshop is a pixel-level editor, not a batch processor. You cannot edit a whole house in Photoshop efficiently. It is a tool for specific, difficult images, not for processing the entire job.
4. Capture One Pro
Capture One is often favored by studio photographers, but it has a loyal following in the architectural world as well. It is known for its exceptional color science and tethering capabilities.
Superior Color Engine
Capture One handles RAW files differently than Adobe. Many photographers feel that it renders colors more naturally and accurately right out of the gate. For high-end real estate or interior design photography where color accuracy of fabrics and paint is paramount, this is a significant advantage.
Keystone Correction
The “Keystone” tool in Capture One is excellent for perspective correction. It lets you draw lines on the vertical and horizontal axes to straighten the image. It is intuitive and precise.
Tethering
If you shoot high-end architecture and bring a laptop to the site, Capture One’s tethering (shooting directly into the computer) is the best in the class. It allows you to see the image on a large screen instantly to check focus and lighting.
5. Luminar Neo
Luminar Neo positions itself as a creative editor with a heavy focus on AI tools for specific tasks.
Sky AI and Relight AI
Luminar was one of the first to popularize one-click sky replacement. Their tool is very good. It detects the sky and replaces it, but also “relights” the scene to match the new sky. For real estate photographers who constantly deal with drab weather, this is a handy feature. “Relight AI” creates a 3D map of the image, allowing you to brighten the foreground (the house) without blowing out the background.
Structure AI
This tool enhances detail and texture. In real estate, it can help bring out the texture of stone, brick, or wood flooring. However, it must be used carefully to avoid making the photo look gritty.
Workflow Limitations
Luminar Neo is often slower than Lightroom or Imagen when handling large batches of files. It is best used as a plugin for specific creative effects rather than a full production workhorse for high-volume shooters.
6. Phixer
Phixer is a hybrid solution. It is a service/app that connects photographers with manual editors.
The Outsourcing Model
Unlike the software listed above, Phixer is primarily about sending your files away. You upload your raw photos, and a team of human editors processes them. They handle blending, color correction, and retouching.
Standardized Output
Phixer aims to deliver a consistent, standardized “real estate look”—bright, clear, and sharp. Their system includes standard services like sky replacement, lawn greening, and vertical correction as part of their packages.
Turnaround Time
Because it relies on humans (aided by software), the turnaround is typically 12 to 24 hours. This is standard for the industry, but slower than instant AI processing.
7. BoxBrownie
BoxBrownie is another major player in the outsourcing space. They are a cloud-based service known for specialized real estate edits.
Virtual Staging BoxBrownie is famous for its virtual staging. If you photograph an empty room, you can upload it to them, and they will digitally add furniture. This helps buyers visualize the potential of the space.
Day to Dusk. They also specialize in “Day to Dusk” conversions. They take a photo shot during the day and edit it to look like it was shot at twilight, with glowing windows and a sunset sky.
Pay Per Imag.e The model is transactional. You pay for each image you want edited. This can get expensive for high-volume shoots compared to a flat-rate software subscription or bulk AI processing.
8. ON1 Photo RAW
ON1 Photo RAW tries to be the “all-in-one” alternative to the Adobe ecosystem. It combines a browser, a RAW processor, and layers into one piece of software.
No Subscription. One of its main selling points is that you can buy it outright with a perpetual license. You do not have to pay a monthly fee (though they do offer subscriptions for cloud syncing).
AI Noise Reduction and Resize. It includes “NoNoise AI” to clean up grainy photos, which is useful for shooting in dark basements or bathrooms. It also includes “Resize AI” for upscaling images for large prints.
HDR and Layers, like Lightroom, have built-in HDR merging. Like Photoshop, it has layers. It attempts to do everything, which makes it versatile, though some users find the interface more cluttered than dedicated tools.
9. DxO PhotoLab
DxO PhotoLab is a technically advanced RAW editor that focuses on optical corrections and noise reduction.
DeepPRIME Denoising
DxO is famous for its “DeepPRIME” technology. It removes noise from RAW files with incredible efficiency while retaining detail. For real estate photographers shooting with smaller sensors or in very low light, this is a lifesaver.
Lens Corrections
DxO has a massive database of camera and lens combinations. It automatically corrects distortion, vignetting, and chromatic aberration (color fringing) specific to your gear. This is vital for real estate, where wide-angle lenses often distort the edges of the frame.
10. Affinity Photo
Affinity Photo is a powerful, low-cost alternative to Photoshop.
Perpetual License
Like ON1, it is a one-time purchase. It is very affordable compared to Adobe’s monthly plan.
Advanced Retouching
It offers a full suite of retouching tools: frequency separation, in-painting (object removal), and liquefy. It supports HDR merging and focus stacking.
Single Image Focus Affinity Photo is designed for editing one image at a time. It does not have a “library” or “catalog” system like Lightroom or Imagen. It is a tool for deep editing of “hero” shots, not for processing a full real estate shoot.
Criteria: How to Choose the Best Real Estate Photography Editing in 2026
Choosing the right tool depends on your business model. Are you a high-volume shooter doing four houses a day, or a luxury architectural photographer doing one house a week? Here are the criteria to consider:
1. Speed and Turnaround Time
In real estate, time is money. You need a tool that allows you to import, process, and export quickly.
- AI vs. Manual: AI tools (like Imagen) process images in seconds. Manual editing (like Photoshop) takes minutes per photo. Outsourcing (like BoxBrownie) takes hours or days.
- Batch Processing: Can the software handle 50 photos at once? Real estate shoots are rarely single images; they are sets. The ability to apply settings across a whole set is crucial.
2. Consistency
A real estate agent wants their listings to look uniform. They don’t want the kitchen to look cool and blue while the living room looks warm and yellow.
- Profile Learning: Tools that learn your style ensure that every shoot looks like your brand.
- White Balance Control: The software must handle mixed lighting effectively to create a cohesive look throughout the home.
3. Specific Feature Set
Real estate has unique technical requirements. A generic photo editor isn’t enough.
- HDR Capability: The software must be able to merge bracketed exposures naturally.
- Geometry Tools: Vertical correction is mandatory.
- Window Management: You need a way to control window exposure (Window Pulls).
- Sky Replacement: Essential for maintaining quality regardless of the weather.
4. Cost and Scalability
Consider the cost per listing.
- Subscription vs. Per Image: Services that charge per image can eat into your profit margins on large shoots. Flat-rate software or low-cost bulk AI credits are usually more scalable for growing businesses.
- Volume: Does the price drop as you shoot more?
5. Integration
The tool should fit your existing workflow.
- Adobe Ecosystem: Most photographers use Lightroom Classic for cataloging. A tool that integrates with Lightroom (via plugins or direct support) prevents you from having to move files around constantly.
A General Guide to Real Estate Photo Editing
Editing is only half the battle. To get the best results from any software, you need a solid workflow. This guide outlines the professional process for creating listing-ready images.
Phase 1: The Shoot (Shooting for the Edit)
You cannot edit what you did not capture. Modern real estate editing relies on “data.” You need to feed the software enough information to work with.
1. The Bracketed Sequence Do not shoot single frames. The dynamic range between a dark hallway and a bright window is too high for any camera sensor.
- Technique: Set your camera to Auto-Exposure Bracketing (AEB).
- Settings: Shoot 3 or 5 frames. Usually, spaced 2 stops apart (-2, 0, +2).
- Why: This captures the shadows (in the +2 shot), the mid-tones (in the 0 shot), and the window details (in the -2 shot). Tools like Imagen use this data to create the perfect final image.
2. Consistent White Balance While you can fix color in post, it helps to be consistent. Set your camera to a manual Kelvin temperature (e.g., 4500K or 5000K) rather than Auto. This keeps the color consistent from room to room, making batch editing much faster.
3. Level Your Camera Use a geared head on your tripod. Get the camera perfectly level. While “Perspective Correction” software is powerful, it crops the image when it straightens lines. If you shoot too crooked, you will lose important parts of the room when the software fixes it.
Phase 2: Culling (The Selection)
Before editing, you must remove the bad shots. This is called “culling.”
1. Grouping Real estate shoots often result in hundreds of files because of bracketing. If you shot 5 brackets for every angle, a 20-photo shoot equals 100 files.
- Tip: Use software that “stacks” these brackets. In Lightroom, use “Auto-Stack by Capture Time.” In Imagen, this grouping happens automatically.
2. What to Keep Select the best angle for each room. Avoid duplicates.
- Criteria: Check for focus. Ensure the flash didn’t misfire. Check that you aren’t visible in a mirror.
Phase 3: The Edit
This is where the magic happens. We will assume a workflow using a modern AI tool for the heavy lifting.
1. HDR Merging The first step is blending your brackets.
- The Goal: A natural look. You want to see out the window, but the window frame shouldn’t look gray or muddy. The shadows should be bright enough to see the floor texture, but not so bright that the room looks flat.
- Automation: Use your software to merge the stacks. This creates a high-information base file.
2. Geometry and Vertical Correction Fix the lines.
- Verticals: Ensure all vertical lines (walls, door frames, cabinets) are parallel to the side of the frame.
- Horizontals: Check the horizon line in exterior shots.
3. Color Correction Real estate usually aims for “bright and neutral.”
- White Balance: Remove color casts. Walls should usually look white or neutral beige, not orange (from tungsten lights) or blue (from shade).
- HSL (Hue, Saturation, Luminance): You might need to desaturate the oranges and yellows slightly if the wood floors are casting an orange glow on the white ceiling.
4. The Window Pull If the HDR merge didn’t perfectly recover the view, perform a window pull.
- The Fix: Recover the highlights in the window area. AI tools can detect the window pane and darken it selectively, revealing the trees or sky outside.
5. Sky Replacement Check your exteriors. If the sky is white or gray, replace it.
- Matching: Ensure the sun direction in the new sky matches the shadows in the photo. If the house has shadows on the left, the sun in your sky must be on the right.
Phase 4: Delivery
1. Export Settings Real estate agents need specific file sizes for the Multiple Listing Service (MLS).
- Resolution: Typically 2048px on the long edge is standard for MLS.
- Format: JPEG, usually at 70-80% quality to keep file sizes small (under 1MB) for fast loading.
2. Delivery Use a delivery platform that creates a professional experience. Sending a Google Drive link is functional, but a dedicated gallery allows the agent to view, download, and share easily.
Frequently Asked Questions
1. What is the difference between real estate editing and regular photo editing? Real estate editing focuses on technical accuracy and selling a property. It deals specifically with balancing extreme lighting differences (indoor vs. outdoor), correcting architectural distortion, and ensuring color accuracy for flooring and paint. Regular editing often prioritizes mood or artistic expression.
2. Do I really need to shoot HDR (brackets) for real estate? Yes. Interior lighting is almost always darker than the sunlight outside. A single photo cannot capture both the dark corners of a room and the bright view out the window. Bracketing captures the full range of light, allowing software to blend them for a balanced image.
3. Can AI really replace manual editing for real estate? For the vast majority of tasks, yes. AI tools in 2026 can handle HDR merging, vertical straightening, and color balance faster and more consistently than humans. However, complex “cleanup” tasks (like removing a messy bed or a reflection) may still require manual Photoshop work.
4. What is a “Window Pull”? A Window Pull is a technique used to make the view through a window visible and clear, rather than a bright white blow-out. It involves masking the window glass and using a darker exposure from your brackets to show the outside view.
5. How much time can I save using AI for editing? Photographers report saving up to 96% of their editing time. A manual edit of a 30-photo home might take 90 minutes. With AI batch processing, the same home can be ready for review in under 5 minutes.
6. Is cloud processing safe for my photos? Yes. Reputable platforms like Imagen prioritize security. They use encrypted connections to upload and download data. Furthermore, many workflows allow you to keep your original high-resolution RAW files on your local hard drive, only syncing “Smart Previews” or data to the cloud.
7. Why do my interior photos look orange? This is usually due to “tungsten” or “soft white” light bulbs. Our eyes adjust to this color, but cameras see it as bright orange. You need to adjust the White Balance (Temperature) in your editing software to cool down the image and make the whites look neutral.
8. What is the best file format for real estate delivery? JPEG is the industry standard. Most MLS systems require JPEGs. While you should shoot and edit in RAW for maximum quality, the final file delivered to the agent should be a resized JPEG.
9. Can I edit real estate photos on a tablet or phone? While mobile apps exist, they are generally not recommended for high-volume professional work. They lack the robust batch-processing, HDR merging, and file management capabilities of desktop software like Lightroom Classic or Imagen.
10. How do I handle color casts from bright walls? If a room has a bright red wall, it will bounce red light onto the white ceiling. To fix this, use the HSL (Hue, Saturation, Luminance) tool in your editor. Select the red or orange channel and desaturate it slightly, or use a local adjustment brush to paint over the ceiling and desaturate the color cast.
11. What is “Flambient” photography? Flambient stands for “Flash + Ambient.” It is a shooting technique where you take one shot with natural light (ambient) and one shot with a flash. You then blend them in Photoshop. The flash shot gives accurate colors, and the ambient shot gives natural shadows. It produces high quality but requires more time on site and more time editing.
12. Should I offer virtual staging? Yes. Virtual staging (digitally adding furniture to empty rooms) is a high-value add-on. It helps buyers understand the scale of a room. Many editing services and some AI tools now offer this.
13. How do I choose between outsourcing and using AI software? Outsourcing (sending files to a human team) is good if you want absolutely zero involvement, but it takes 12-24 hours and can be expensive per photo. AI software is instant and much cheaper, but requires you to spend a few minutes reviewing the files on your computer. If speed and profit margin are your goals, AI software is usually the better choice in 2026.